How to invite someone to your account, give them the right role and unit, and keep track of invitations until they're accepted.
Who this is for: Administrators and User Managers.
Before you start
- You need to be an Administrator or User Manager. If you can see the Users area, you have access.
- Decide two things for each person: their role (see Roles and permissions explained) and the unit they belong to.
- You can only give a role at or below your own. Only an Administrator can invite another Administrator.
Invite someone by email
- Open the User Management area and click Invite Users (top right). This works from any tab.
- Stay on the Email tab.
- Choose the Role for the people you're inviting.
- Choose the Org Unit they belong to.
- Enter the email address. You can add several at once by separating them with commas or spaces. Everyone in this invitation gets the same role and unit.
- Send. Each person receives an email invitation.
To invite people with different roles or units, send a separate invitation for each group.
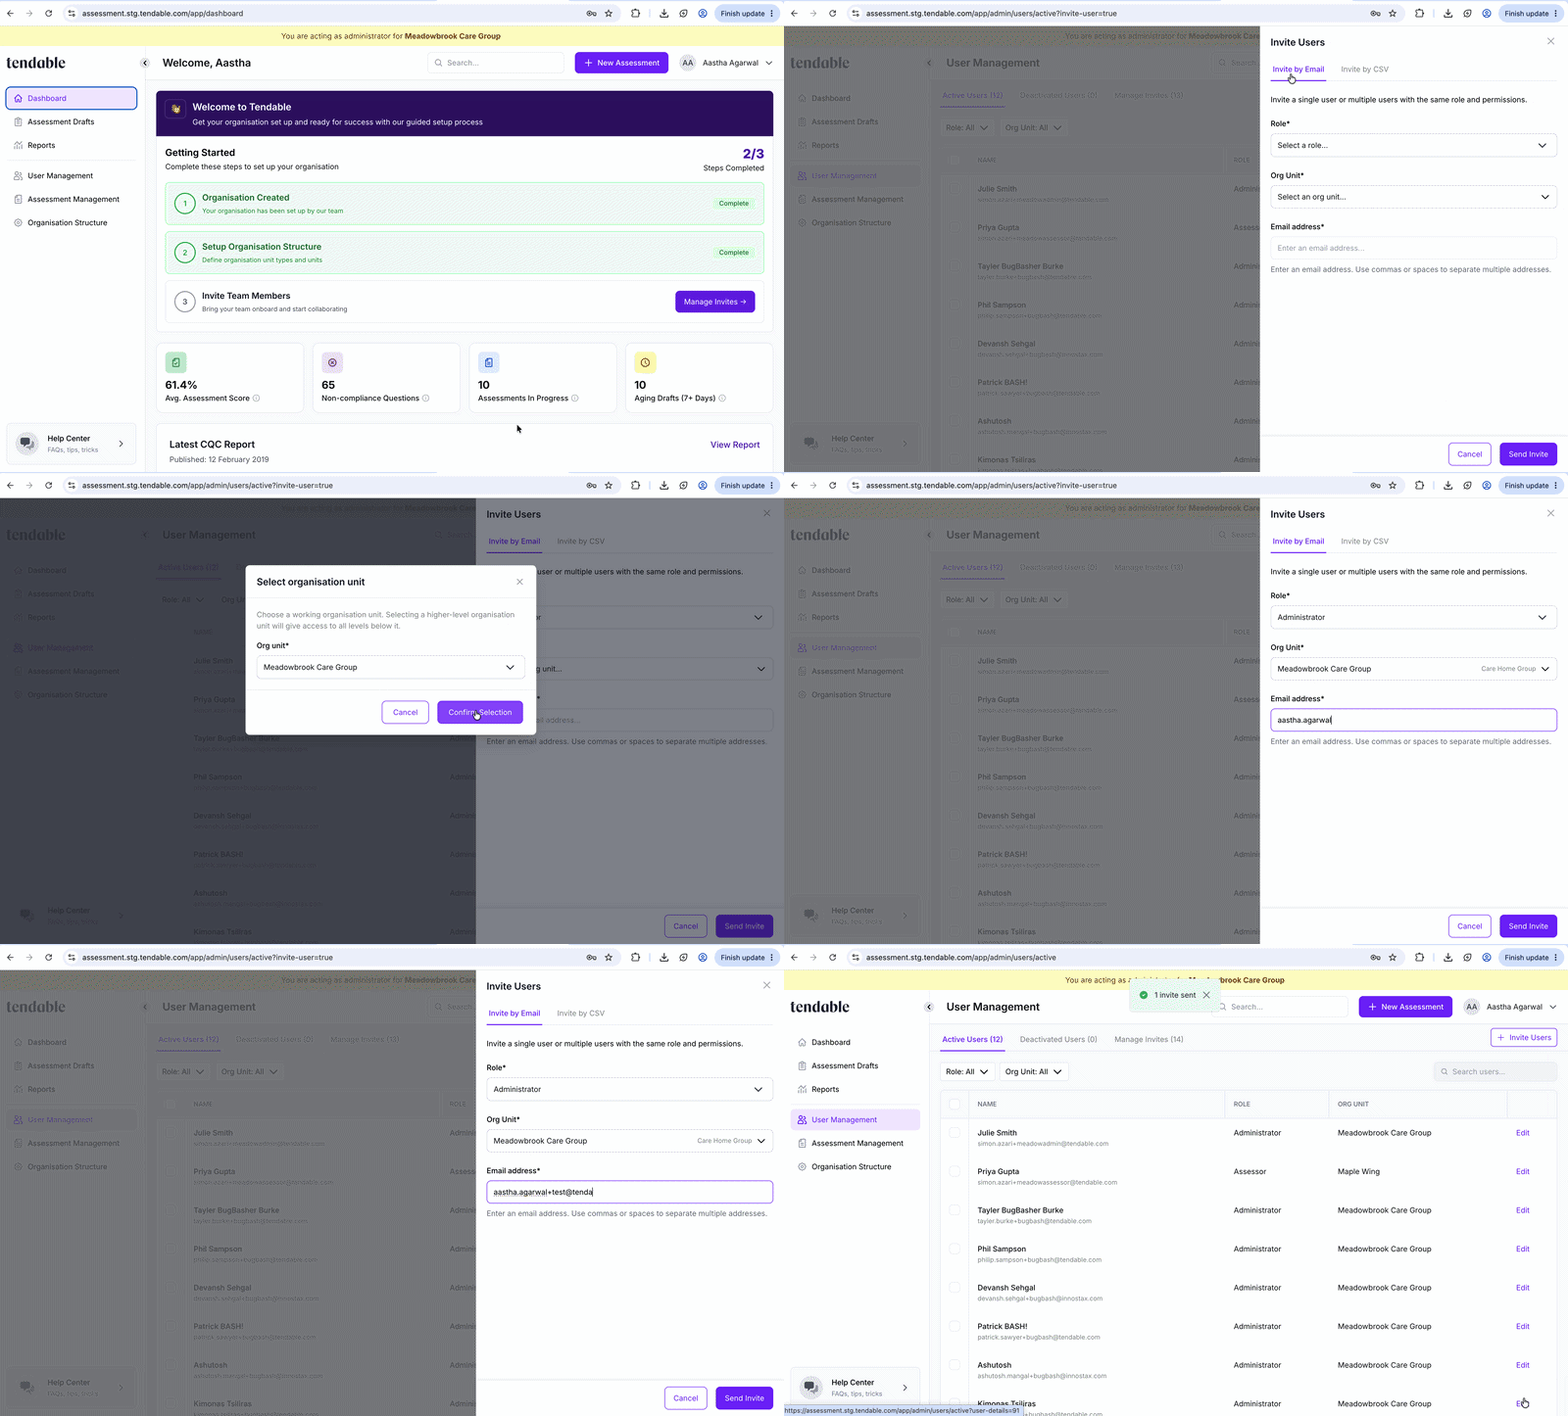
Invite by email
What the person receives
The invitation email contains a secure link. When they open it, they:
- Set their own password.
- Confirm their name.
- Are signed straight in.
For security, new accounts have two-step verification switched on, so they'll be asked for a verification code when they sign in. The invitation link expires after 7 days. If it lapses, you can resend it (see below).
Inviting lots of people at once (CSV)
If you're onboarding a large group, use the CSV tab instead of typing each address.
- In the invite panel, switch to the CSV tab.
- Click Download Example CSV to get a file in the right format.
- Fill in one row per person, with these columns: email, name, role, org unit id.
- role can be viewer, assessor, user manager, or administrator.
- org unit id is the number in the Org Unit ID column of your Organisation Units table (in the Organisation structure area).
- Upload the file and send.
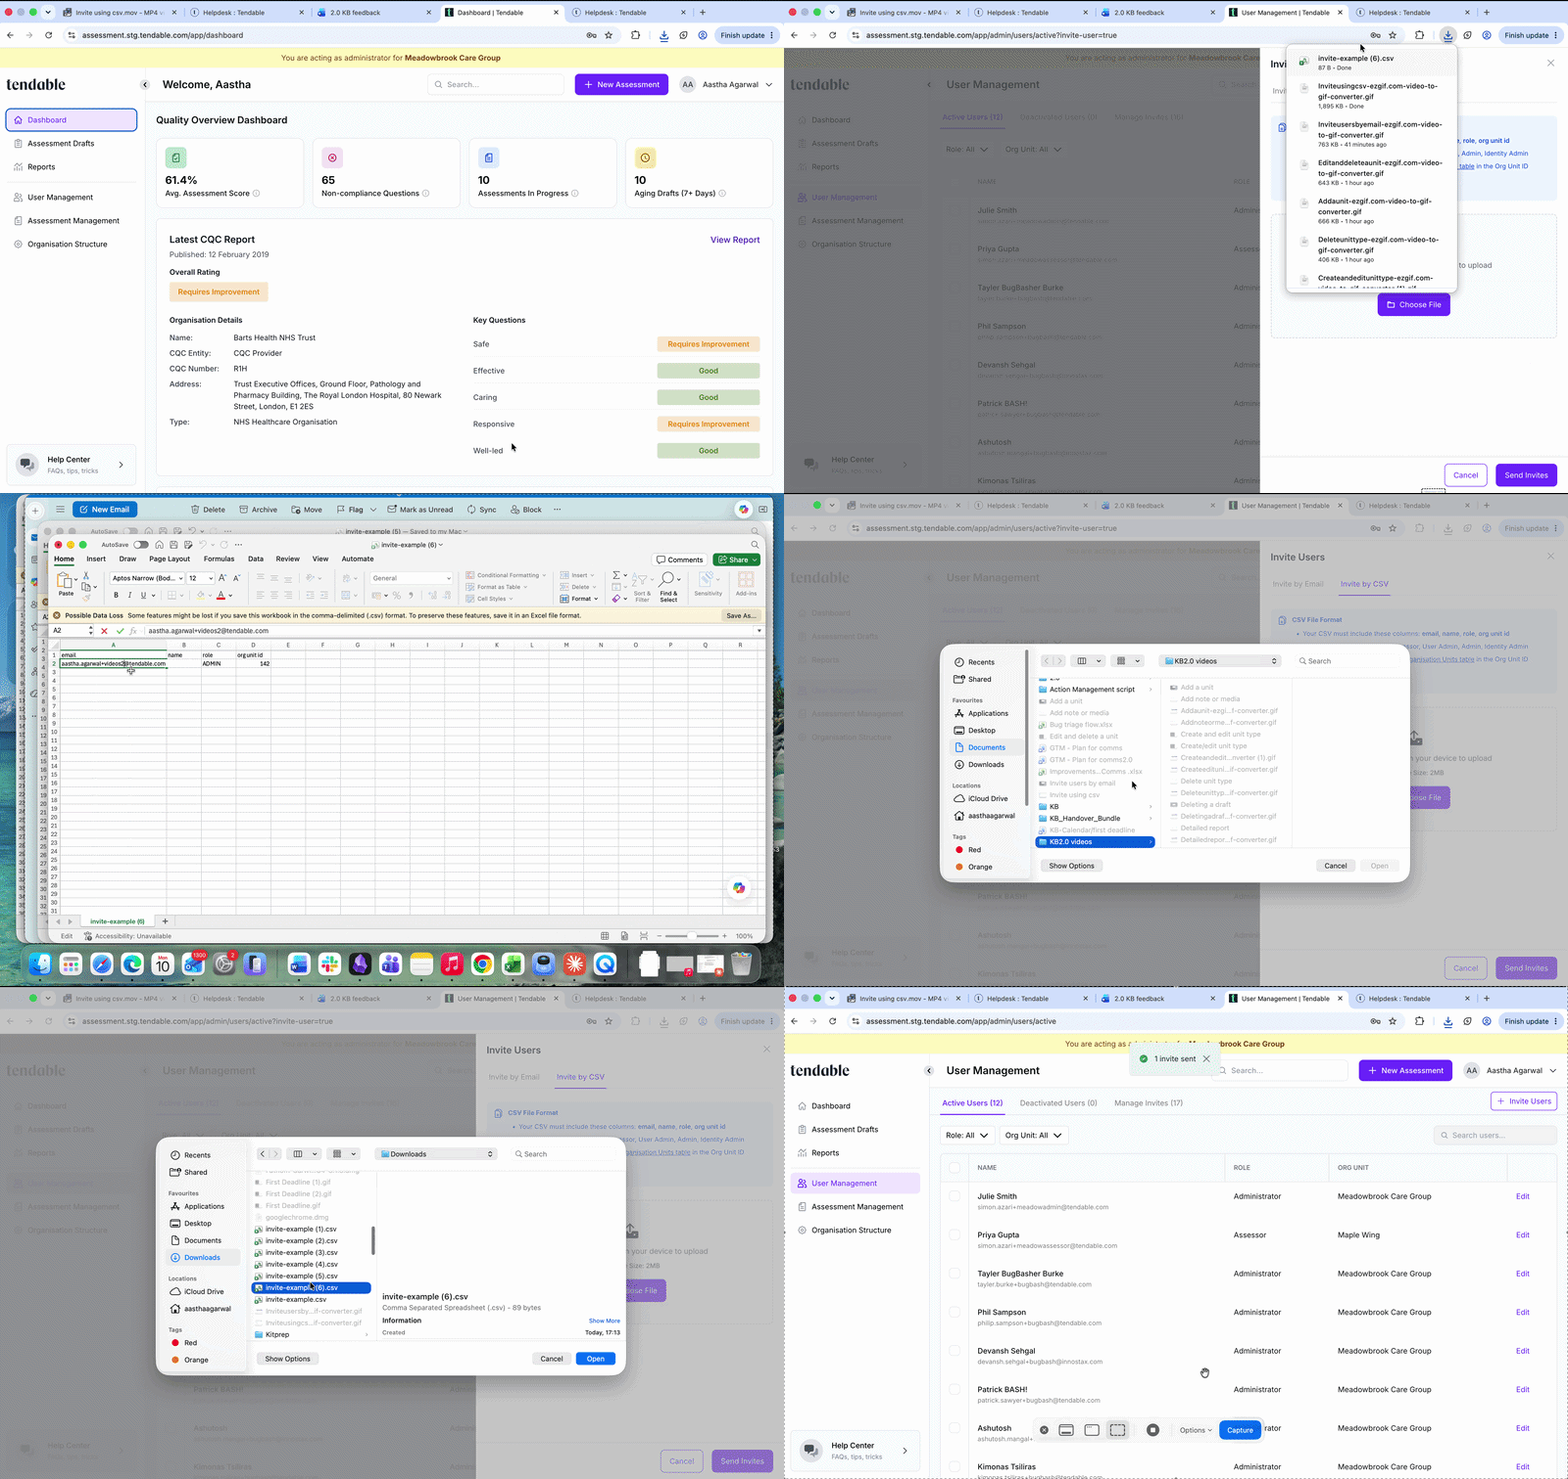
Invite using CSV
Track and manage invitations
Open the Manage Invites tab to see everyone you've invited. Each invitation shows a status:
- Pending — sent, not yet accepted, still within the 7 days.
- Accepted — the person has set up their account. They now appear under Active Users.
- Expired — the 7 days passed before they accepted.
Select one or more invitations to resend (which sends a fresh link and resets the clock) or delete.
You can't resend or delete an invitation once it's been accepted, because the person is now a full user. To remove their access, deactivate them instead (see Deactivate or reactivate a user).
Tips & troubleshooting
- "This email address is already in the list." You've entered the same address twice in one invitation. Remove the duplicate.
- An email address won't accept the invitation. Each email can only have one account. If that person already has an account, you don't need to invite them again.
- They didn't get the email. Ask them to check spam first. If it's been more than 7 days, the invitation has expired, so resend it from Manage Invites.
- Password won't save on signup. Passwords need at least 8 characters and a mix of upper and lower case, a number, and a special character.
- You can only invite into your own part of the structure. The unit picker shows your unit and everything beneath it, not units elsewhere.
Related articles
- Roles and permissions explained
- Deactivate or reactivate a user
- How your organisation structure works (finding the Org Unit ID)
Was this article helpful?
That’s Great!
Thank you for your feedback
Sorry! We couldn't be helpful
Thank you for your feedback
Feedback sent
We appreciate your effort and will try to fix the article