We have introduced dedicated screens for selecting Areas and Inspections. This feature is a significant step up from the original Areas and Inspection selection filters that previously lived on the home screen.
Why We Made This Change
- Putting personalization back in users' hands. We want users to choose the Areas and Inspections relevant to them, so they receive accurate communications and notifications that matter to them. Admins retain the ability to make changes.
- The old filters weren't working. The previous filters were hidden, unintuitive, and rarely used correctly. This undermined their purpose: sending targeted communications and surfacing relevant content on users' home screens, the first page they see when they log in.
What's Changing (New User Flow)
For New Users
Registration
- Users will see an optional Area field to select the Areas they belong to while registration. They can skip this if they are unsure.
- When approving a user, admins can view and edit the Areas that user has selected.
First Login
- On first login, users will see a mandatory Area selection screen, pre-filled with their previously selected Areas, which they can still change.
- Users will then see an optional Inspection selection screen, where they can choose specific inspection types if they want to
For Existing Users
- On login, users will see a mandatory Area selection screen.
- Users will then see an optional Inspection selection screen, where they can choose specific inspection types if needed.
How to Choose an Area
You'll see a list of Sites, each containing one or more Areas. You can:
- Tap a Site to select all of its Areas at once.
- Expand a Site to select individual Areas within it. If you select only some of a Site's Areas, that Site's checkbox will appear partially selected.
Tap Confirm to save your choices; it displays a live count of how many Areas you've selected.
If you have completed an inspection in the last 60 days, or you're listed as Team In Charge for any Areas, those Areas will be automatically pre-selected for you, along with a message explaining why. You can adjust this selection before confirming.
Area Selection Fallback
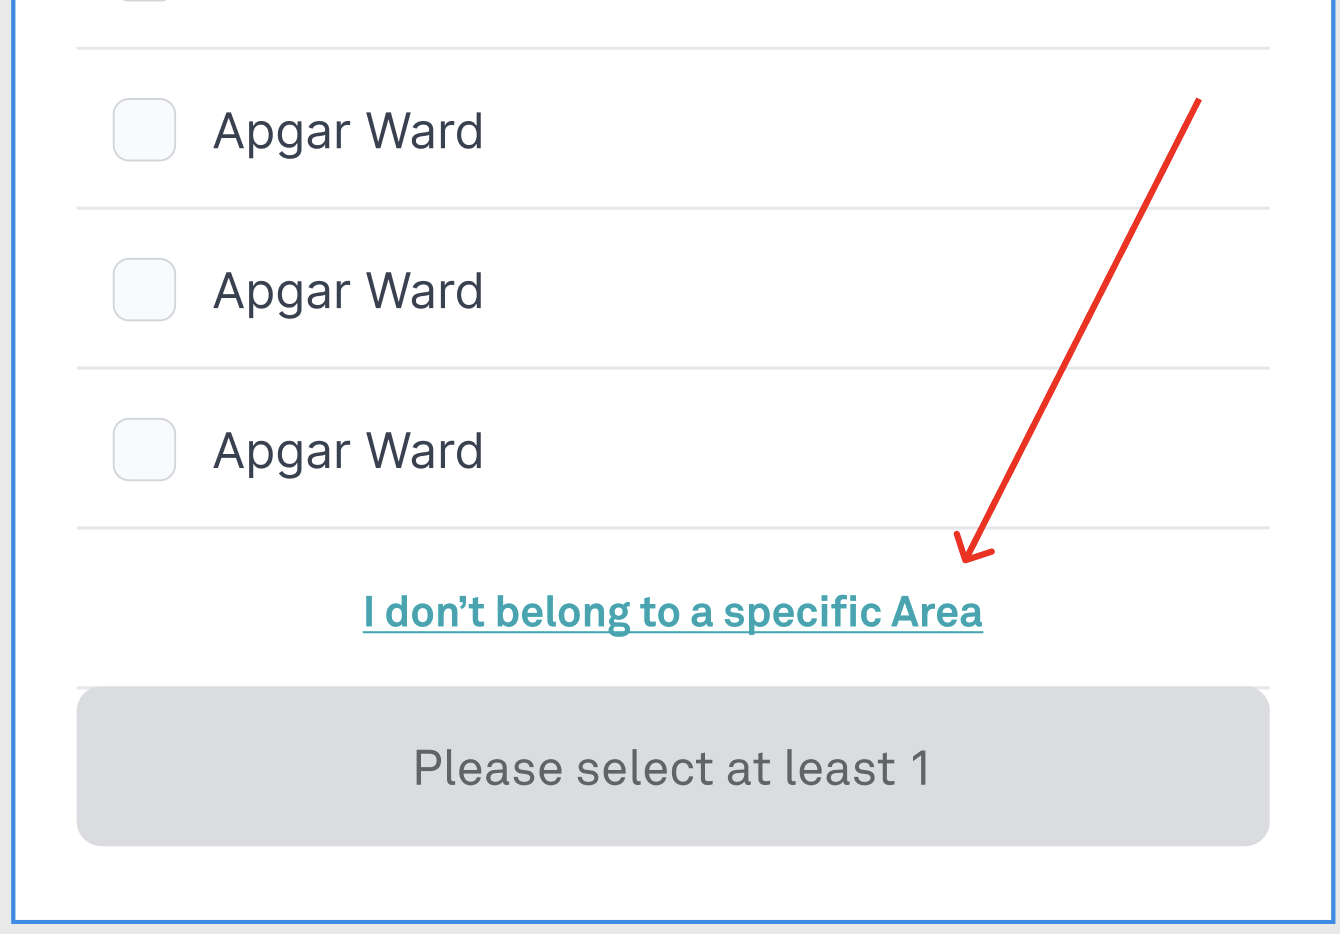
For users who don't belong to a specific Area, or who are unsure what to select, a fallback option lets them move forward without making any Area selection. This prevents users from selecting incorrect Areas simply to progress.
How to Choose an Inspection
You'll see a list of the inspection types you have permission to inspect. You can:
- Tick individual inspection types to select them.
- Tick Select All to select every inspection type at once, or untick it to deselect them all
- Tap Confirm (N) to save your choices; it displays a live count of how many inspection types you've selected.
You can confirm with none selected if you'd rather not choose any inspection types right now. You'll see a warning, but it won't block you. This screen cannot be dismissed without confirming your choice, including a zero selection.
If you have completed at least one inspection in the last 60 days, those inspection types will be automatically pre-selected for you, along with a message explaining why. You can adjust this selection before confirming. Newly approved users with no inspection history won't see this message.
Changing Your Areas & Inspections Later
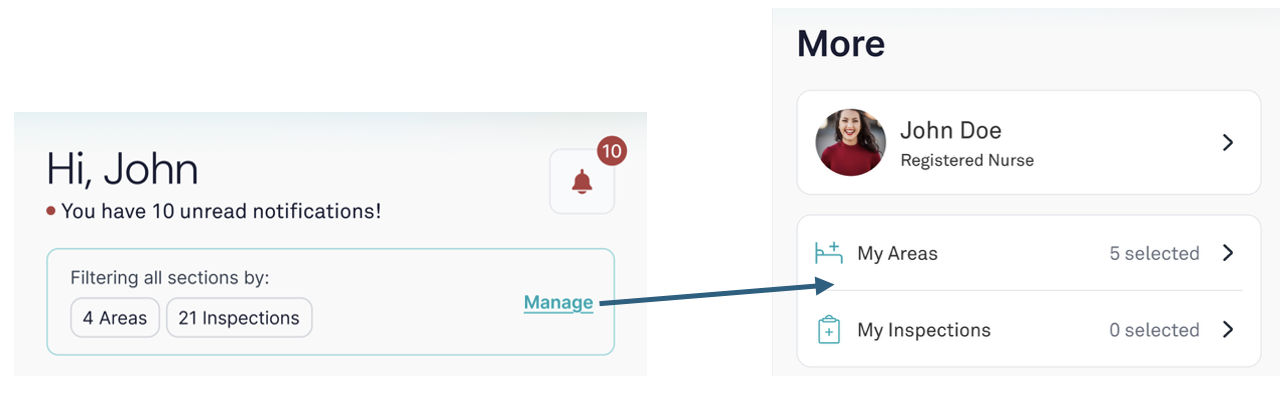
- You can view or update your selected Areas and Inspections at any time via the filters at the top of the homepage.
- These filters take you to the My Inspections and My Areas sections inside the More section, where you can make updates.
Was this article helpful?
That’s Great!
Thank you for your feedback
Sorry! We couldn't be helpful
Thank you for your feedback
Feedback sent
We appreciate your effort and will try to fix the article